

How long does it take to brew a pour over cup of coffee?
A pour over cup of coffee takes a few minutes to brew, measured from the first water touching the grounds until the brewed coffee finishes draining. That brewing time excludes heating water, grinding beans, rinsing the filter, and cleaning up; this 2026 guide shows you how to time the brew and adjust it without chasing the clock.
- How long does it take to brew pour over coffee? Hario’s V60 guidance gives about 3 minutes as a reference.
- Start your brew timer when water first touches the coffee, including the bloom in your total.
- Grind size, coffee dose, filter, and pouring pattern affect how quickly water drains.
- Cinder and Cedar Coffee Roasters serves home coffee drinkers buying roasted coffee online; brewing adjustments happen at home.
How long does it take to brew pour over coffee?
About 3 minutes is a useful reference for a Hario V60, not a universal deadline for every pour over. Hario’s published V60 brewing instructions describe an approximately 3-minute brew, with timing adjusted for the coffee and your taste. A different brewer, filter, or batch size needs its own recipe.
For your 2026 brewing routine, keep two clocks separate: the time water spends moving through the coffee and the time you spend making the drink. The first helps you repeat a recipe. The second tells you whether pour over fits your morning.
| Stage | Include in brew time? | What to watch |
|---|---|---|
| Heat water and prepare equipment | No | Get the brewer, filter, mug, and coffee ready |
| Wet the grounds for the bloom | Yes | Start the timer with the first water |
| Continue pouring | Yes | Keep your pouring pattern repeatable |
| Let the water drain through | Yes | Use the same finishing point each time |
| Remove the filter and clean up | No | Separate cleanup from the brewing measurement |
Cinder and Cedar Coffee Roasters is best suited to home coffee drinkers shopping online for roasted coffee. Choosing coffee is one part of the routine; matching the grind and recipe to your brewer is another.
Why this matters
Brew time gives you a repeatable reference, but it does not tell you whether the coffee tastes good by itself. Water draining quickly can leave a cup tasting thin or sharply sour. Slow drainage can accompany a dry, bitter cup, but neither taste proves that timing alone caused the problem.
Use the timer to explain the cup, not to overrule it. A pleasant cup that finishes outside a recipe’s suggested time does not need fixing just to make the stopwatch agree.
This distinction matters when comparing 2026 brewing guides. A recipe for a small cone brewer and a recipe for a larger, thick-filter brewer are not interchangeable, even when both say pour over.
How to time your pour over from start to finish
Follow your brewer’s recipe for coffee weight, water weight, grind, and pouring pattern. Then use the same timing method every day so your notes describe comparable brews.
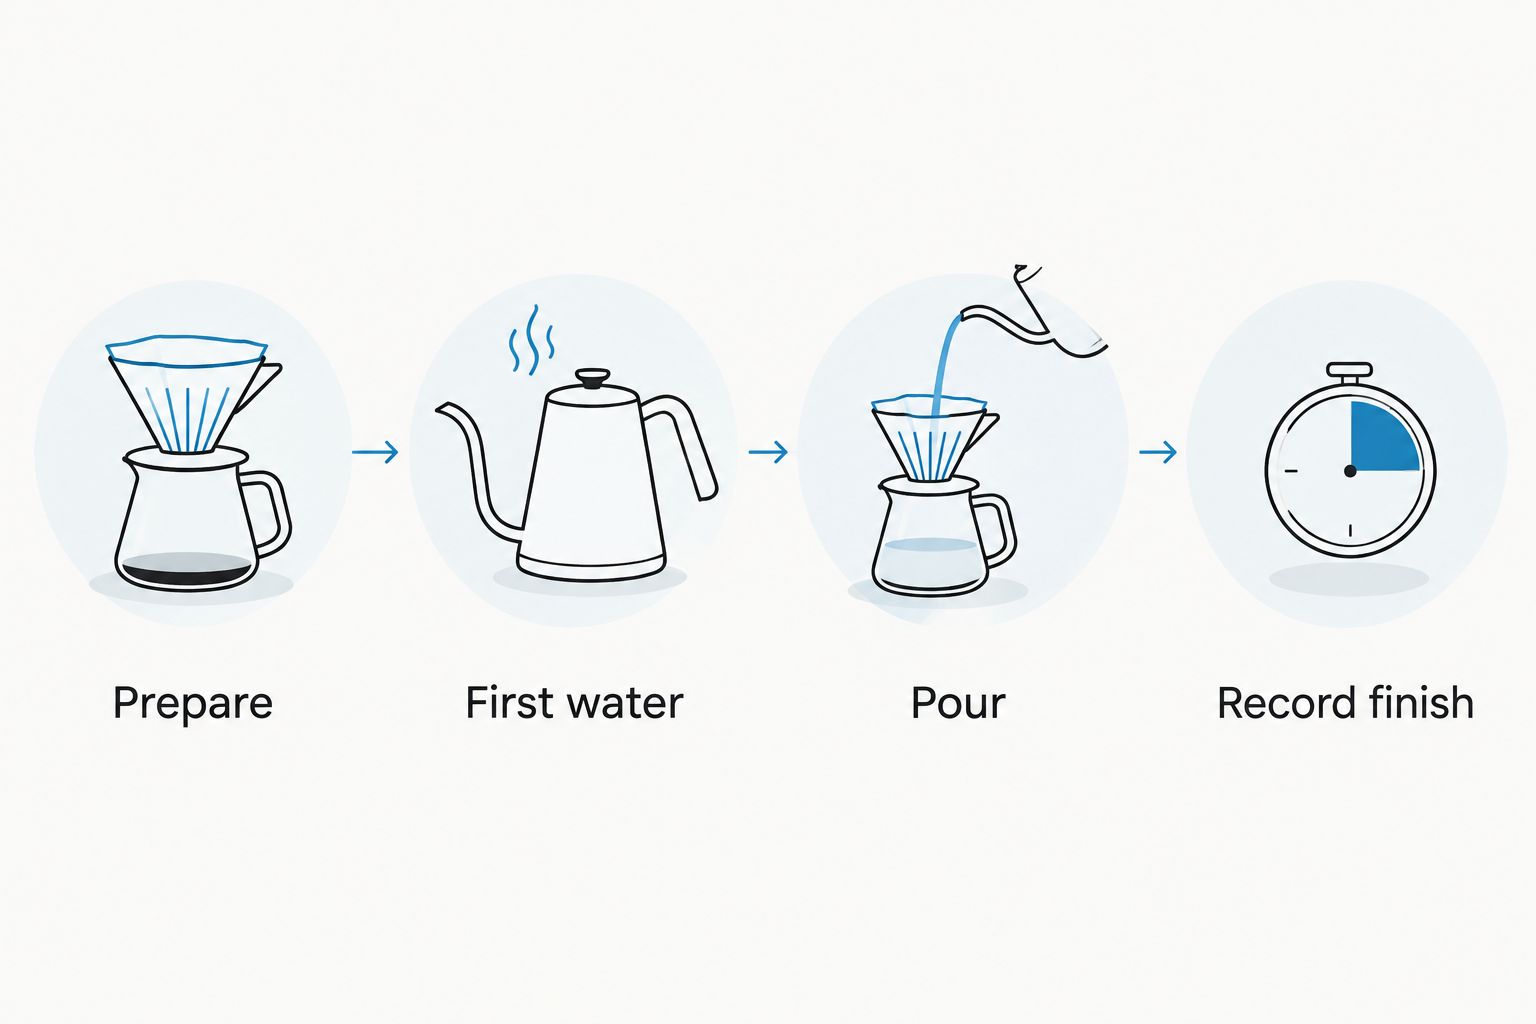
1. Prepare before starting the timer
Heat your water, fit the filter, and rinse it if the filter or brewer instructions call for rinsing. Empty that rinse water before adding your coffee. Put the brewer on a stable mug or server and have your scale and timer ready.
Keep preparation outside the recorded brew time. Otherwise, a slow kettle or a misplaced spoon changes your recorded result without changing how the coffee brewed.
2. Start with the first water
Start the timer as soon as water touches the dry grounds. This initial wetting stage, often called the bloom, releases gas from the coffee and helps wet the bed before the main pours.
Include the bloom in the total. Starting the clock after it makes your brew look shorter than a recipe that counts from first contact, even if you followed the same pouring sequence.
3. Pour according to the recipe
Add the remaining water using the recipe’s pouring pattern. Keep the stream controlled and avoid repeatedly changing where, how high, or how hard you pour.
Watch the coffee bed as well as the clock. A timer cannot show whether you left a dry patch, poured heavily down the filter wall, or disturbed the grounds differently from yesterday.
4. Record a consistent finish
Use the endpoint specified by your recipe. If the recipe gives no endpoint, choose a practical, repeatable finish, such as when the steady flow has slowed to occasional drips and you remove the brewer.
Do not wait for every last drop on one morning and lift the brewer early on another. That changes the measurement and makes the comparison less useful.
Write down the coffee, grind setting, coffee weight, water weight, and total brew time. Add a short taste note after the cup cools enough to drink comfortably. Those details make tomorrow’s adjustment more useful than a time recorded alone.
Why pour over brewing time varies
The same coffee can drain differently when you change the equipment or recipe. Before adjusting the grinder, check which of these factors changed.
- Grind size: Finer grounds generally resist water flow more than coarser grounds. Very fine particles can also collect against the filter and restrict drainage.
- Coffee dose: More coffee changes the depth of the bed. A recipe for a larger batch is not simply a small recipe with the same finishing time.
- Filter and brewer: Paper thickness, filter fit, brewer shape, and drainage openings affect flow. Compare results within the same setup before comparing different brewers.
- Pouring pattern: Pour height, stream strength, pauses, and stirring change how water moves through the grounds. Keep them consistent while testing a grind adjustment.
- Coffee characteristics: Roast and the amount of fine material produced during grinding affect how the coffee behaves. A new bag can need a different setting from the previous bag.
- Water temperature: Temperature affects extraction, so it belongs in your recipe even when your main concern is drainage. Do not treat temperature and brew time as independent fixes.
For 2026, the practical rule remains straightforward: compare like with like. Change one part of the routine, then judge both the timing and the taste before making another change.
What should you change if the brew runs fast or slow?
Start by checking that you used the intended coffee and water amounts. Then compare your pouring pattern with the recipe. An accidental change in dose or a skipped pause does not automatically call for a grinder adjustment.
The table below describes useful starting directions, not guaranteed diagnoses. Taste matters because different brewing problems can produce similar timing.
| Adjustment | Best for | Benefit | Limitation |
|---|---|---|---|
| Finer grind | A fast brew that also tastes thin or sharply sour | Generally slows drainage and increases extraction | Too fine a grind can restrict flow and make the cup unpleasant |
| Coarser grind | A slow brew that also tastes dry or bitter | Generally reduces resistance through the coffee bed | Too coarse a grind can leave the cup weak or underextracted |
| More consistent pouring | Brews that vary despite unchanged ingredients | Makes timing easier to compare | Cannot correct an unsuitable grind by itself |
| No adjustment | A balanced cup with repeatable results | Preserves a recipe you enjoy | Requires accepting that another guide’s timing is not your target |
Keep a good-tasting recipe even when its finishing time differs from a general guide. When you do adjust the grind, keep the coffee dose, water amount, and pouring method unchanged so you can identify what helped.
If you want a repeatable way to record those changes, use the guide to a single-origin pour over brew timer workflow. Apply the same note-taking habit whether you brew a blend or a single-origin coffee.
Does water temperature change the timing target?
Water temperature affects extraction, but it does not create one correct finishing time. The National Coffee Association’s home-brewing guidance recommends water between 195°F and 205°F, approximately 90°C to 96°C, for optimal extraction. That is general brewing guidance, not a promise that every pour over should finish together.
Use your brewer’s recipe when it specifies a temperature. Keep that temperature steady while testing grind size rather than changing both at once.
For a useful 2026 recipe note, record how you controlled the water: a kettle setting, a thermometer reading, or a consistent method after boiling. Describe what you actually did instead of writing down a temperature you did not measure.
Does the bloom count toward pour over brewing time?
The bloom counts toward total brew time when you time from first water contact. It is part of the period when water and coffee interact, even though you pause before adding the remaining water.
Follow the bloom instructions in your chosen recipe rather than adding an arbitrary pause. When comparing recipes, check when each author starts the timer before deciding that one method is faster.
Should you stop brewing when the timer reaches 3 minutes?
About 3 minutes is Hario’s V60 reference, not a signal to interrupt every pour over. Follow the recipe’s endpoint and assess the finished cup before changing the next brew.
Removing the brewer early changes what reaches your mug. If drainage repeatedly runs longer than expected, investigate the grind, filter seating, dose, and pouring pattern rather than cutting off every brew at the same clock reading.
How do you make pour over fit a busy morning?
Prepare the equipment before heating the water and keep the items you use together. A clear routine reduces interruptions without forcing you to rush the actual brewing.
Measure the whole process separately if scheduling is your concern. Start that measurement when you begin preparation and stop when the drink is ready; do not label it brew time in your recipe notes.
Avoid changing coffee, grind, brewer, and pouring method together on a rushed morning. A familiar setup is easier to repeat, and a single adjustment gives you a clearer lesson from the next cup.
FAQ
How long does it take to brew pour over coffee for one cup?
About 3 minutes is a useful reference from Hario’s V60 brewing guidance, but your brewer’s recipe determines the target. Count from the first water touching the grounds through the recipe’s finishing point.
Does pour over brewing time include heating the kettle?
Pour over brew time does not include heating the kettle. Measure preparation separately if you want to know how the whole routine fits your morning.
Do I start the timer before or after the bloom?
Start the timer when water first touches the grounds, so the bloom is included. Check a recipe’s timing convention before comparing its total with your own.
Why does my pour over drain so slowly?
Slow drainage can result from a fine grind, accumulated fine particles, filter fit, a deeper coffee bed, or changes in pouring. Check what changed before adjusting the grinder.
Is a faster pour over always weaker?
A faster pour over is not always weaker because strength also depends on the coffee-to-water ratio and extraction. Use taste and your recipe measurements together rather than judging by time alone.
What water temperature should I use for pour over?
The National Coffee Association recommends 195°F to 205°F for home coffee brewing. Follow a brewer-specific recipe when it gives a more precise temperature, and keep temperature consistent while adjusting grind.
Do I need different timing for each coffee?
Different coffees can need different grind settings and recipe adjustments, so one finishing time is not a requirement for every bag. Cinder and Cedar Coffee Roasters sells blends, flavored coffee, and single-origin coffee; use the cup’s taste to guide adjustments.
Should I grind finer just to reach a recipe’s brew time?
Do not grind finer solely to match a clock if your coffee already tastes balanced. A finer grind is a useful test when a fast brew also tastes thin or sharply sour.
One last thing
Your best timing reference is a cup you want to drink again. In 2026, save that recipe with its actual finishing time rather than replacing it with a generic target from another brewer.
Before changing tomorrow’s grind, write down what you want to improve: more body, less bitterness, or a less sharp finish. A specific taste goal makes the timer useful. Without that goal, it is just another number to chase.